Author: Iris Carr
Front Gluing Surface

The damage caused by repeated removal of fronts remains a difficult subject. Filler can be used to some extend as long as the damage is not too severe and some restorers have the option of using CNC to restore an area like this without the removal of any original wood. Many of us don’t.
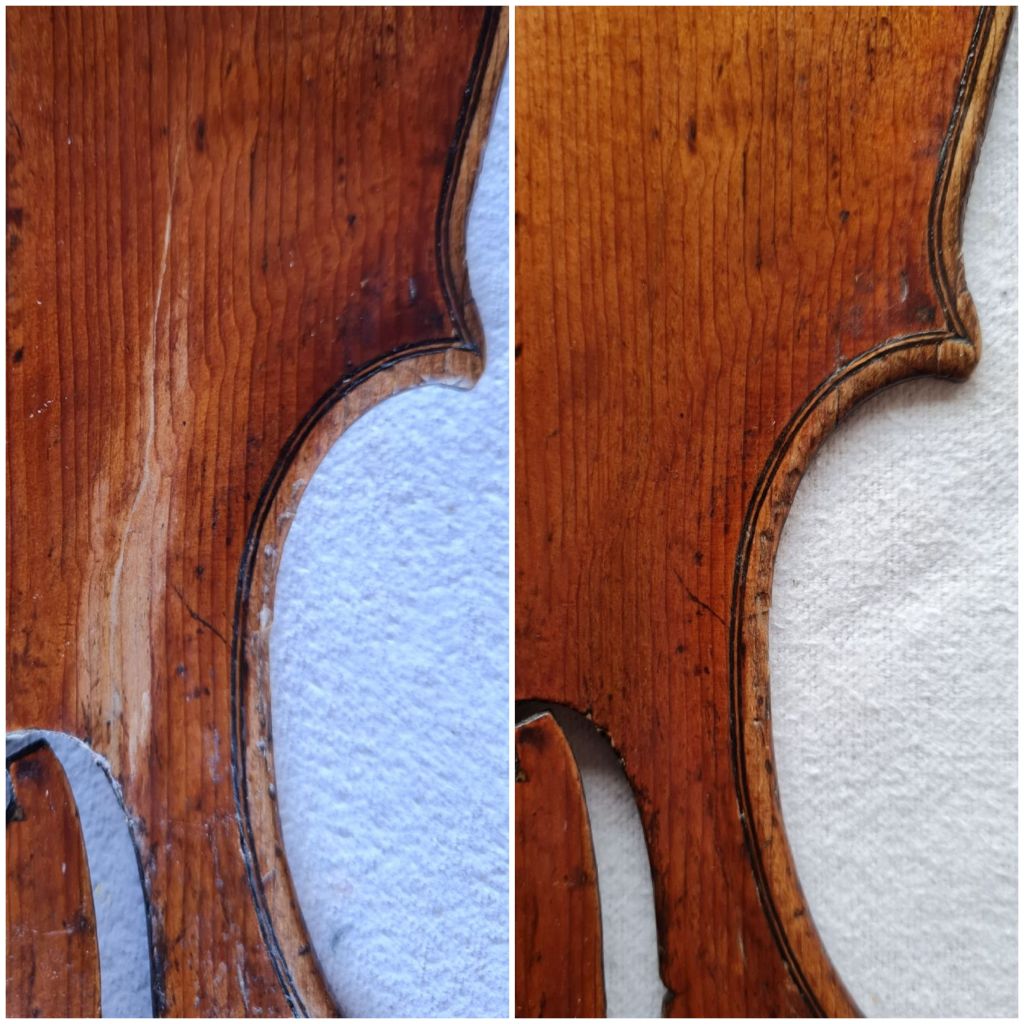
Cracks, Stain and New Wood
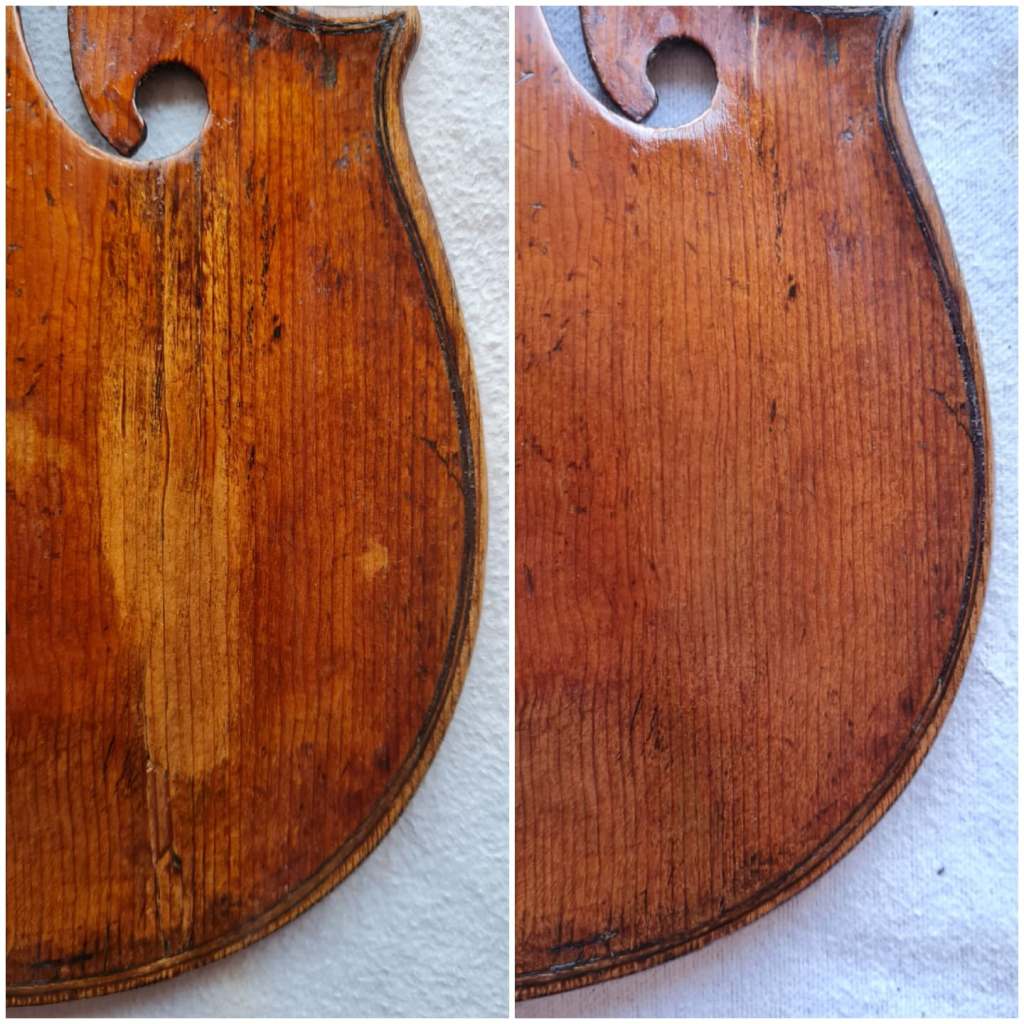
Here I was dealing with heavy staining in the wood, 2 difficult cracks and a piece let in.
Retouching
This morning’s retouch. I just love it.
Rib Tidy-Up
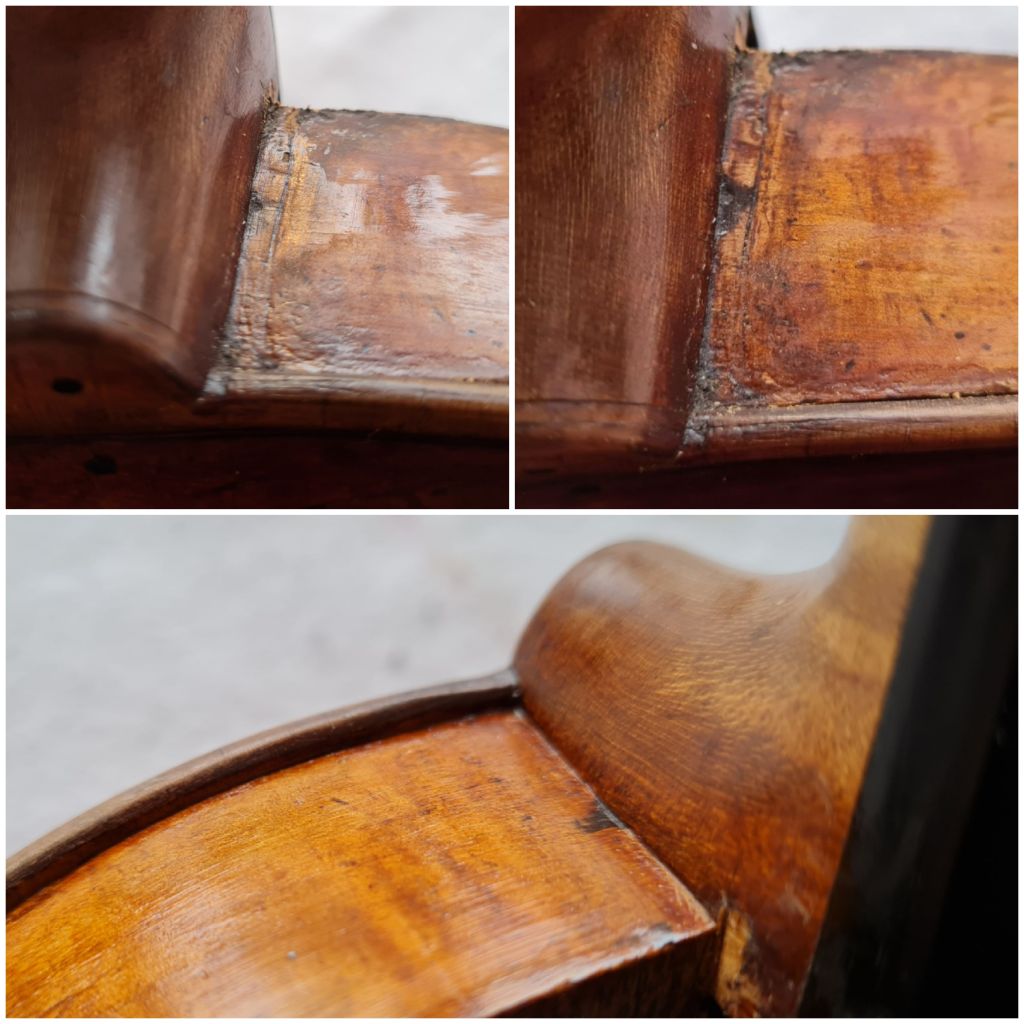
A little tidy-up where a piece had been fitted previously against the rib by cleaning the joint, removing old retouch, levelling with filler varnish and applying new retouch over the top.
Corner Repair
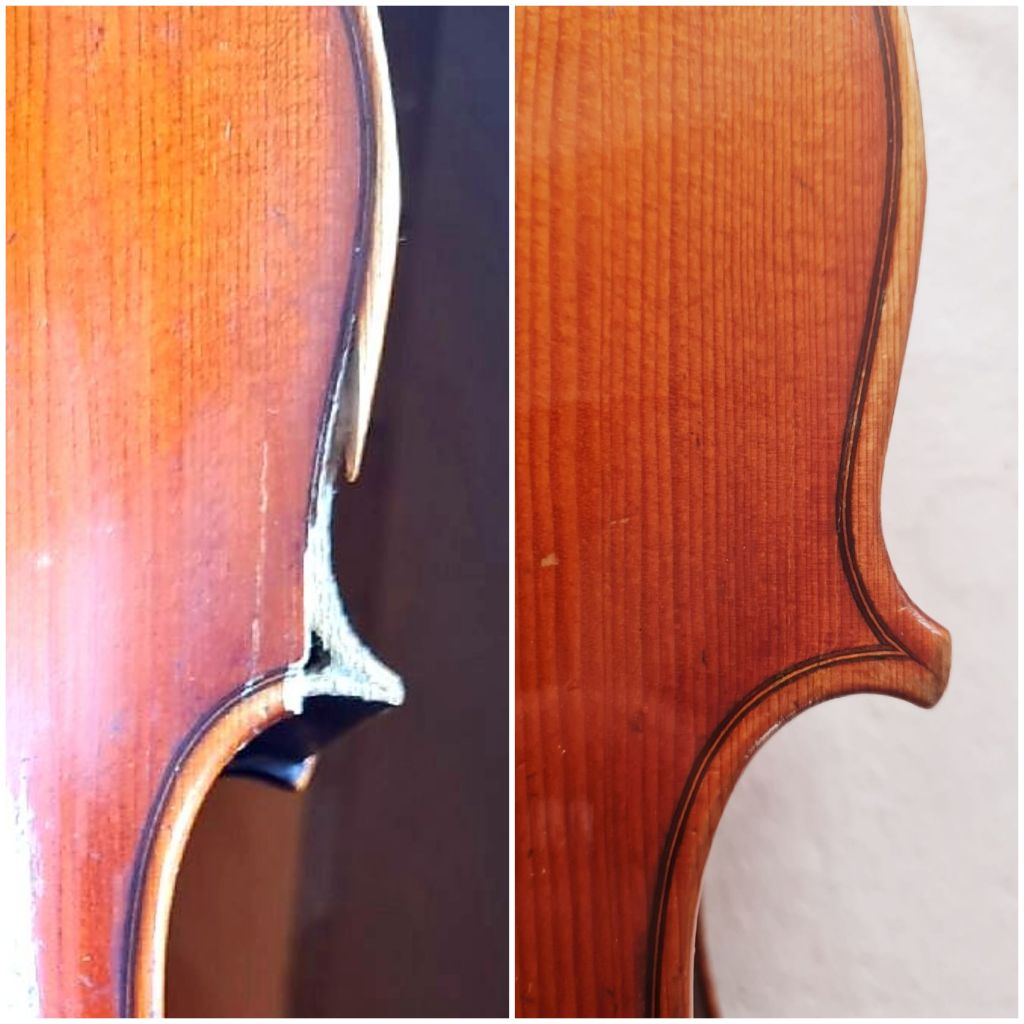
A recent customer job and yes, I did have the missing piece, just forgot to take a photo of it in place! Had to fit a little edge piece where it had broken off in the C curve.
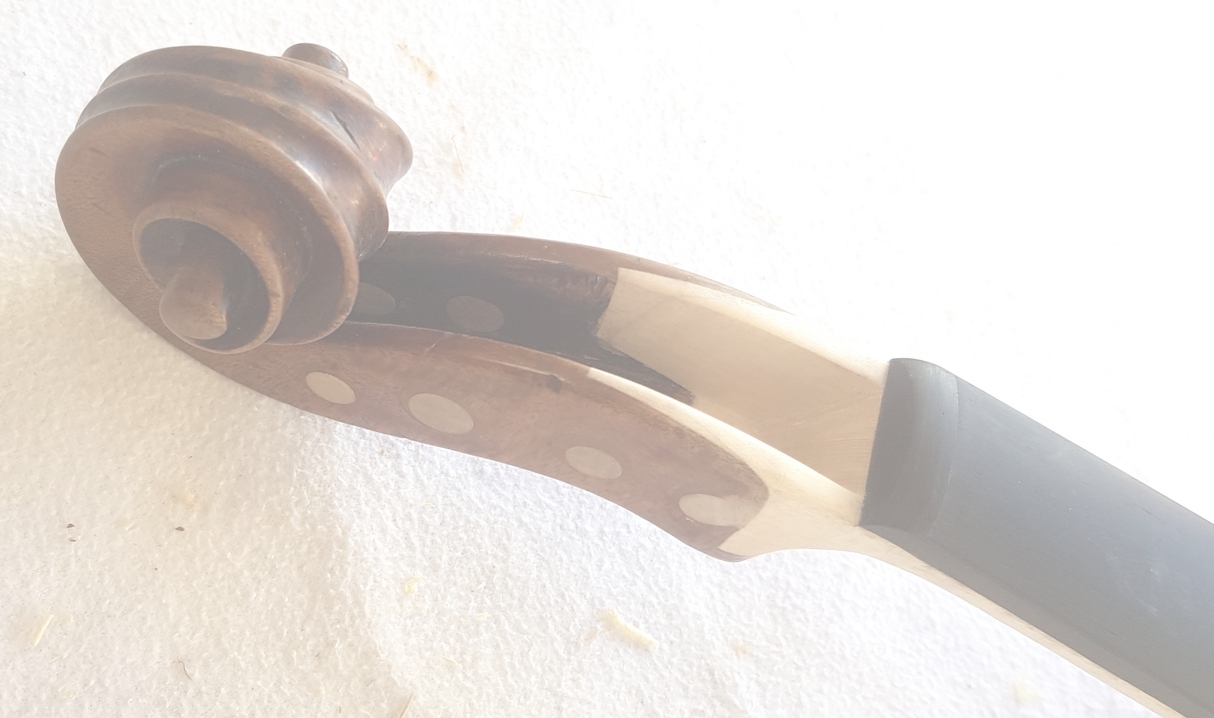
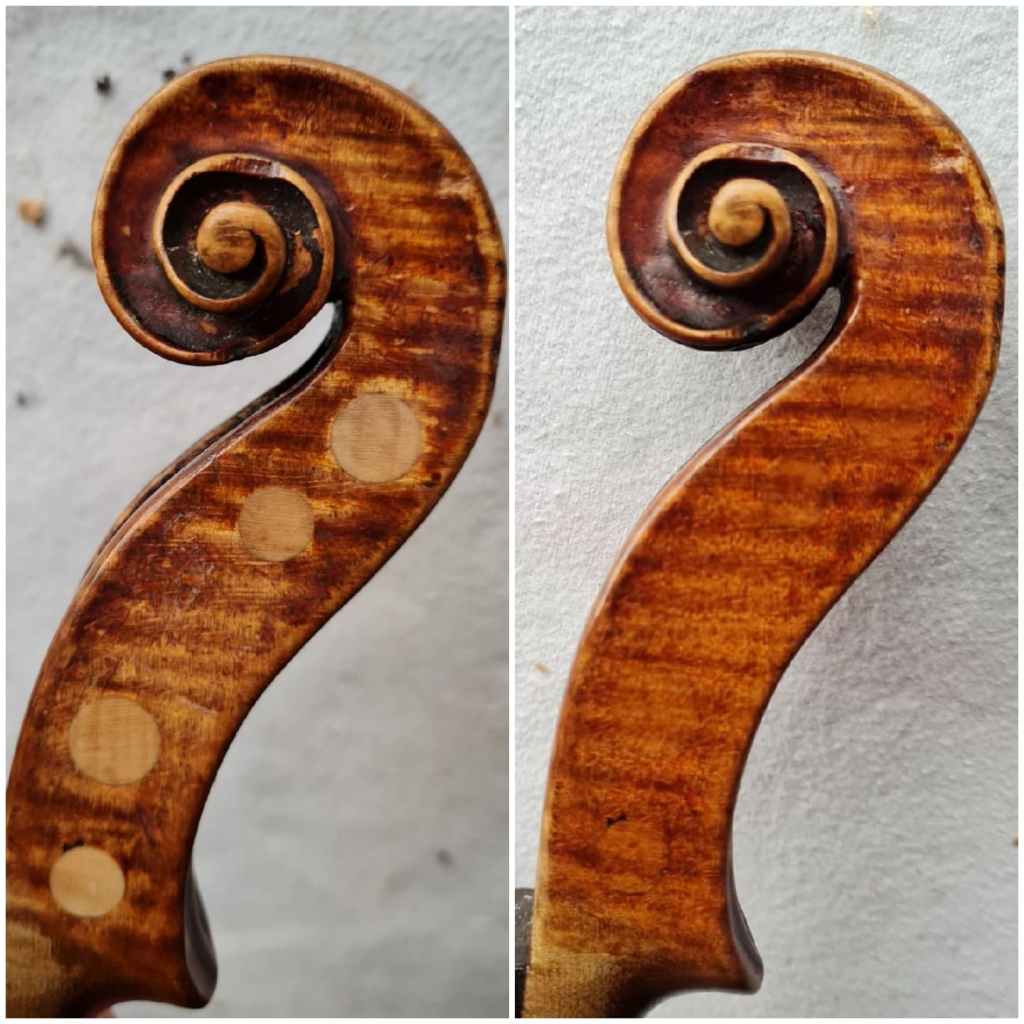
Retouching Pegbushings
Front Gluing Surface

When the front literally has no flat gluing surface in some areas and the least intrusive method available to us, is to run a gouge along the area and to take a large shaving with the same gouge from a piece of matching spruce. It usually takes more than 1 attempt, then it’s chalk-fitted and glued on.
Damaged Rib Work
This sequence of photos show an example of a rib having been damaged along the top from repeated removal of the front over the years and needing to be built up in height.
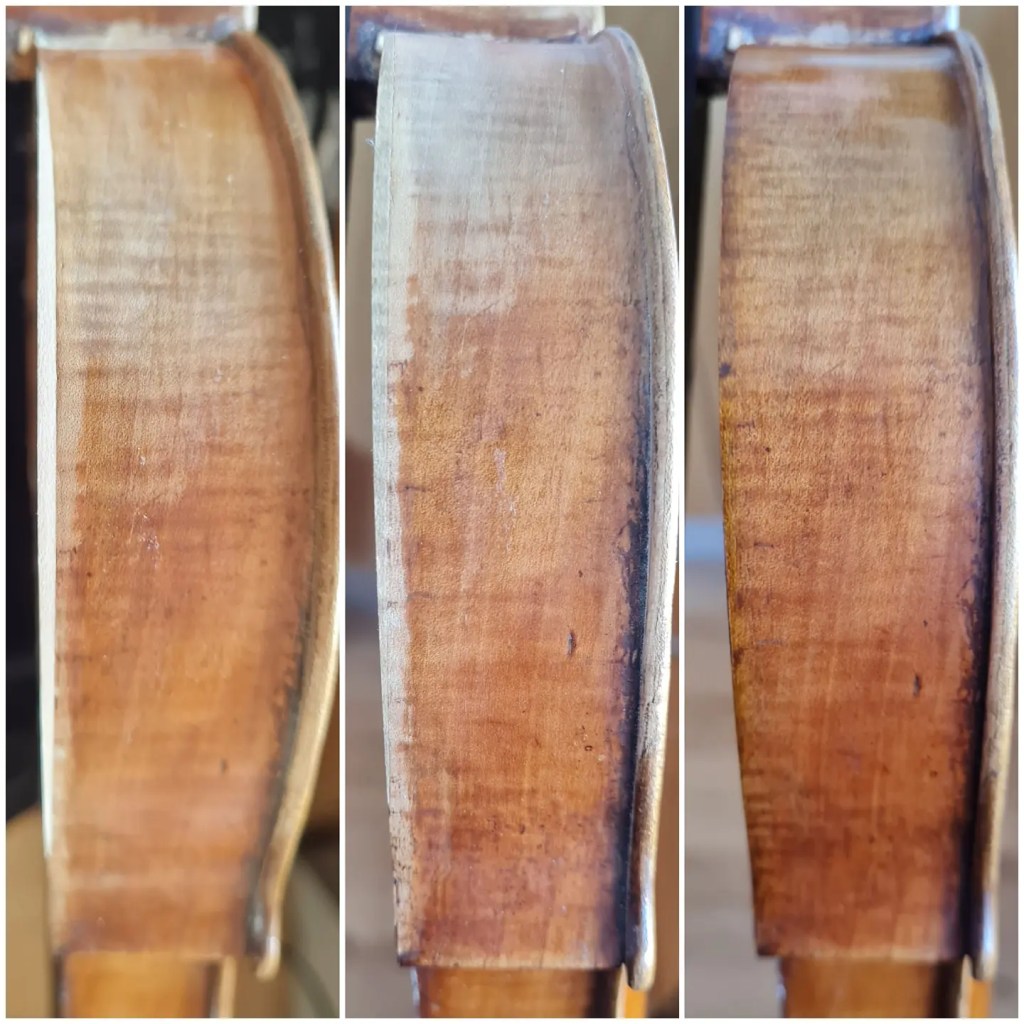
Feathering the Edges

I always check the edges against the light to make sure the colour goes from a dark to a very light orange – only then are the edges thin enough for a shaving to be pressed on in the cast. I use a gouge as well as scrapers and sandpaper to achieve this.
The first shaving has now been glued across the area. 🤞
