COSMETICS ON A TESTORE CELLO
In recent years, I seem to be spending more and more time enhancing the look of an instrument from the outside with minimum intervention. It is usually a matter of improving on previously applied retouch and cleaning out surface dirt in cracks, which are level and securely glued. Once they have been cleaned, I can then adjust the texture and retouch over the cracks.
THE TASK AT HAND
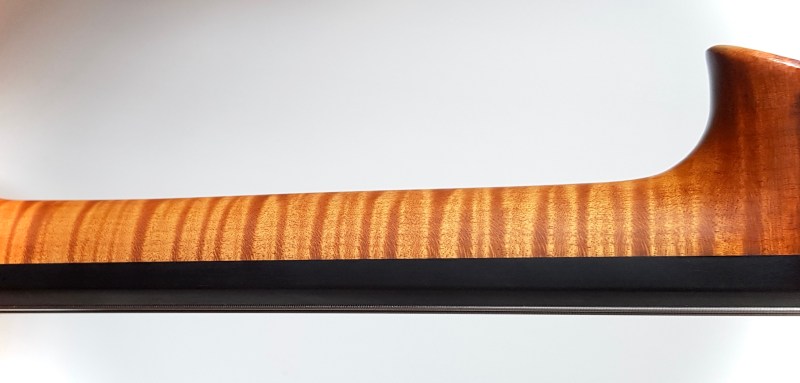
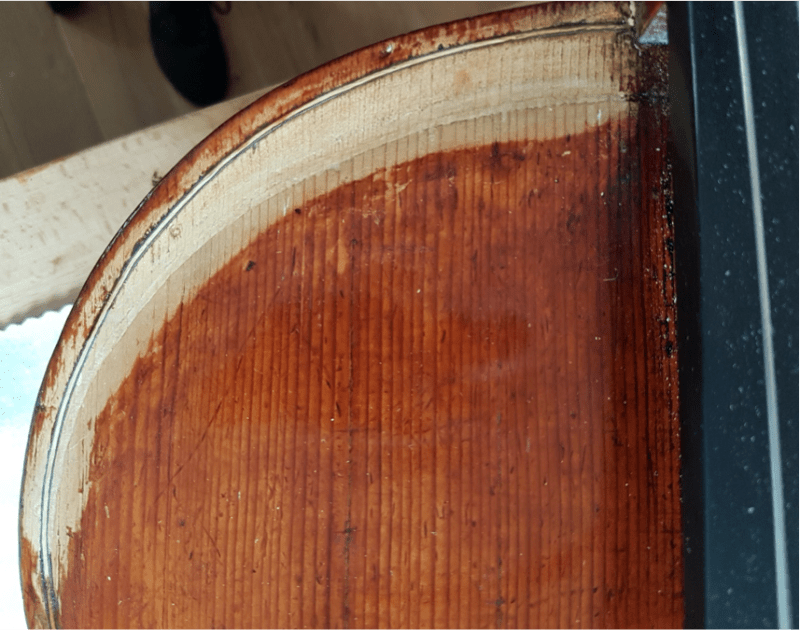
In this instance, my task was to refine the look of a Testore cello which had been lengthened in both upper and lower bouts. The repair itself was structurally sound with half-edging underneath but had not been executed very well in terms of the new wood blending into the original wood. The area had been over-varnished with dark red retouch which did not match the rest of the original varnish. The photos show the different steps in the upper bout bass side of the cello.

BACK TO THE WOOD
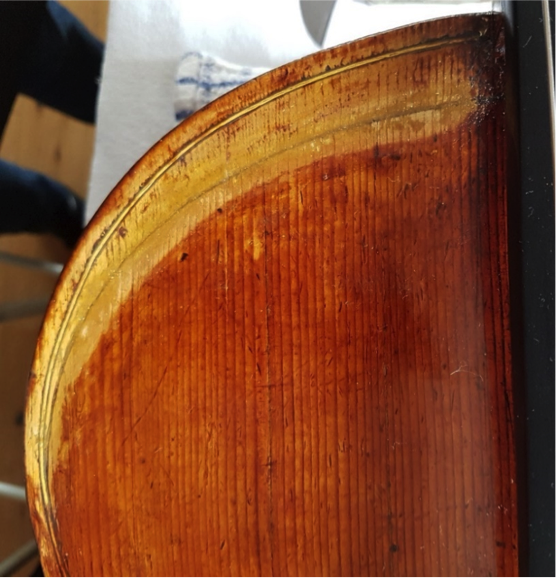
The removal of the retouch revealed a gap between the repair wood and the original wood which had been bridged with a tough yellow filler. As I did not have to worry about losing any original varnish underneath, I used alcohol and acetone to remove the retouch and the filler.
PREPARING THE CHANNEL
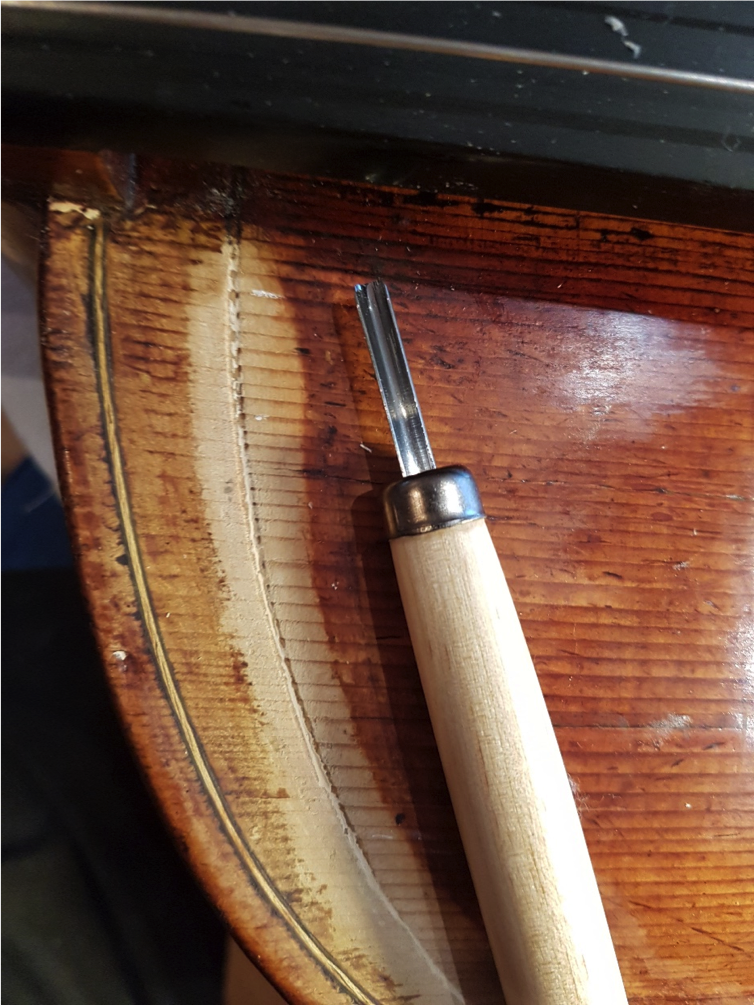
I spent some time cleaning off the filler around the area and then decided the gap was too large to just be re-filled with wood filler but warranted a wood shaving. I ran a tight gouge along the top of the gap, mainly cutting into the repair wood, to avoid minimal removal from the original.
BRIDGING THE GAP
The next step was to find a piece of wood which was a good match in terms of grain width and medullary rays, from which to carve shavings that would fit the gap running along the upper bout. I dampened the piece of wood with hot water and used a very sharp gouge. In total I used 3 shavings to cover the area.

GLUING THE SHAVING
The shavings were gently pressed into the gap with a piece of flexible thick plastic and a wooden counterpart. I used strong fish glue to secure them into the channel.

COLOUR MATCHING
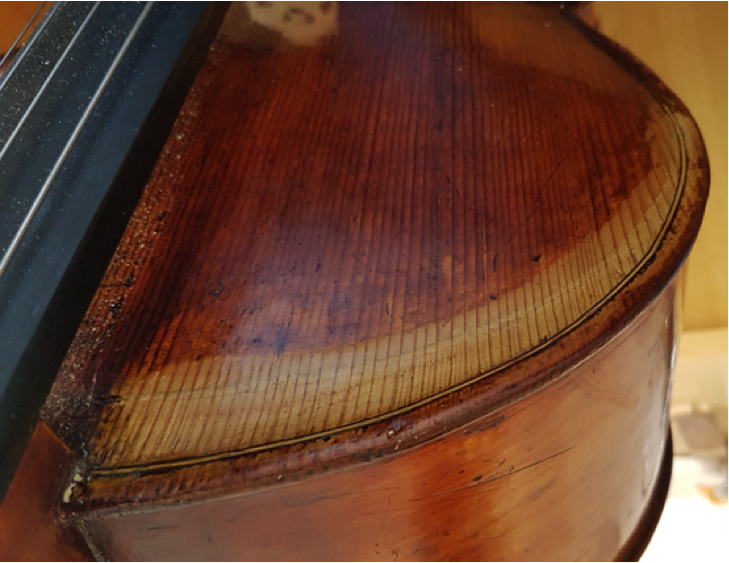
Once dry, I carved down the shaving and carefully stained it to match the wood colour around it using chemical and water stains. Using a water stain also helps with possible reflection issues.
GOING WITH THE GRAIN
When I realised that the grain-lines on the repair wood extension were extremely faint and not matching the original ones very well, I decided to use watercolours to paint the grain-lines of the original wood straight onto the extension piece – ignoring any actual grain-lines on the repair piece.
SMOOTHER CURVE
I had to apply a decent amount of filler varnish to flatten off the obvious kink where the original meets the repair wood and to seal the area. The filler varnish I use is thickened semi-gloss Deft. Once dry, the filler varnish was scraped down flat to create a smooth surface between the original and the repair wood against the light.

TEXTURE
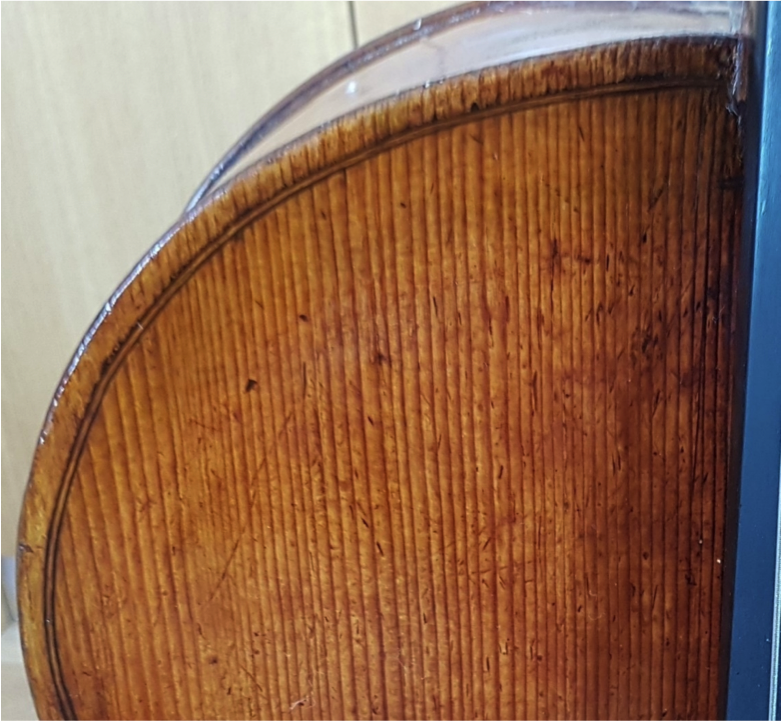
Once the filler varnish has been scraped to a flat, smooth surface, it is imperative to create texture matching the original varnish. It often helps to scrape along the grain lines to distract the eye against the light.

FOOLING THE EYE
Once I was happy with the texture, I put a thin coat of clear spirit varnish over the area with a flat, wide brush. Using a fine-pointed sable brush, I then continued the retouch by re-enforcing the grain-lines further, fading them out into the summer growth and painting them beyond the purfling over the edge. It is best to retouch with a fairly dry brush and to use as little varnish as possible. I then sealed the retouch in with a few thin, clear coats of spirit varnish. It is important to match the gloss-matt value of the retouch to the surrounding varnish from the start. A few distress marks and some patina helped the final completion of the area.
MINIMUM INTERVENTION
Any woodwork procedure we carry out on instruments, whether it is taking a front off, opening up a crack or replacing previous repairs, often inevitably involves losing some wood fibres or small splinters, or cutting further into the original wood to better a previous repair. In many cases, this is a necessity to structurally secure the instrument, but it is always worth asking the question of whether the particular area could be improved upon with minimum intervention to preserve as much of the original wood as possible.
As featured in
British Violin Making Association
Issue 98 / 2020