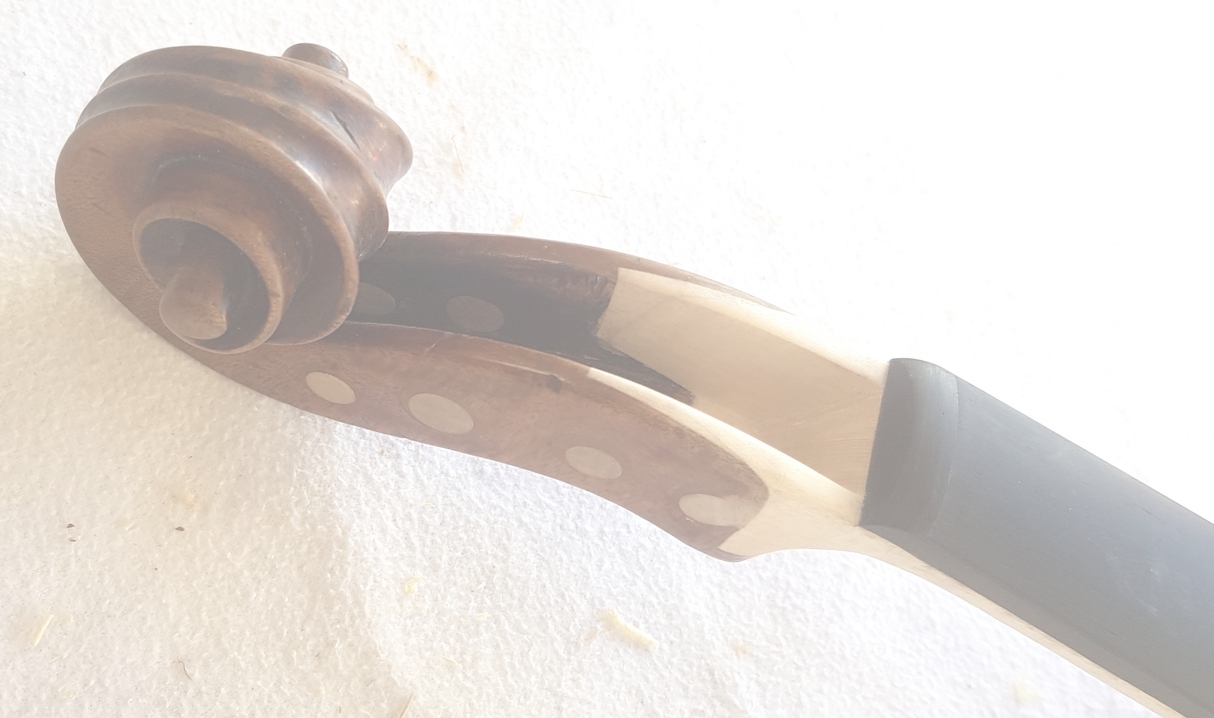

An update on the letterbox restoration, as I know many of you are curious how I’m going to get on with the last process of retouching the area. The fact is that the preparation of the area usually takes me longer than the actual retouching at the end. These are the steps that come first:
- Removal of any unwanted previous retouch and also in this case dealing with severe scratch marks around the area that were caused when the last patch was fitted.
- Sealing the original varnish right up to the new wood, so any staining that may be necessary won’t get into the original wood.
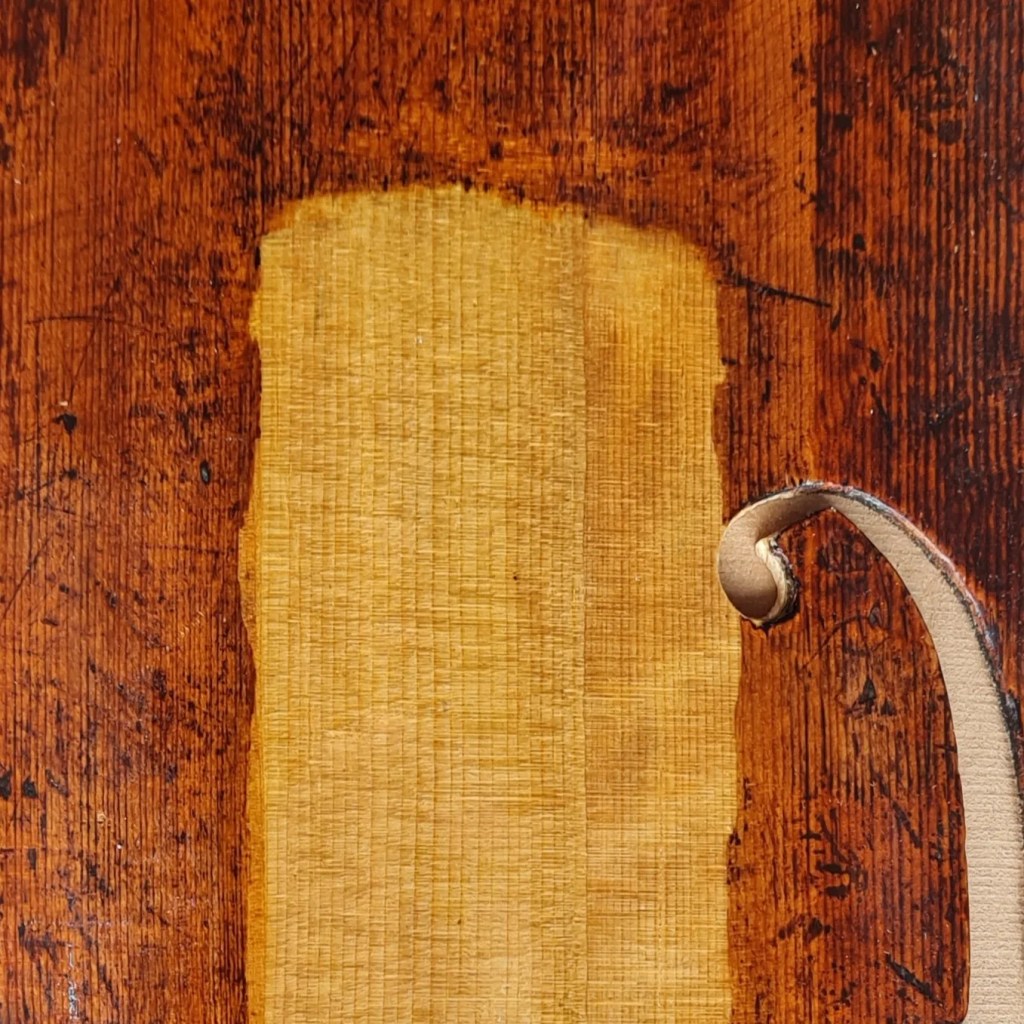
- Getting the ground colour of the new wood as close as possible to the original ground, which usually involves a chemical stain (giving the wood a darker colour without staining it), followed by a water stain if necessary. Fortunately in this case, the shavings were already pretty dark and only the wider shaving needed 1 coat of a chemical stain.
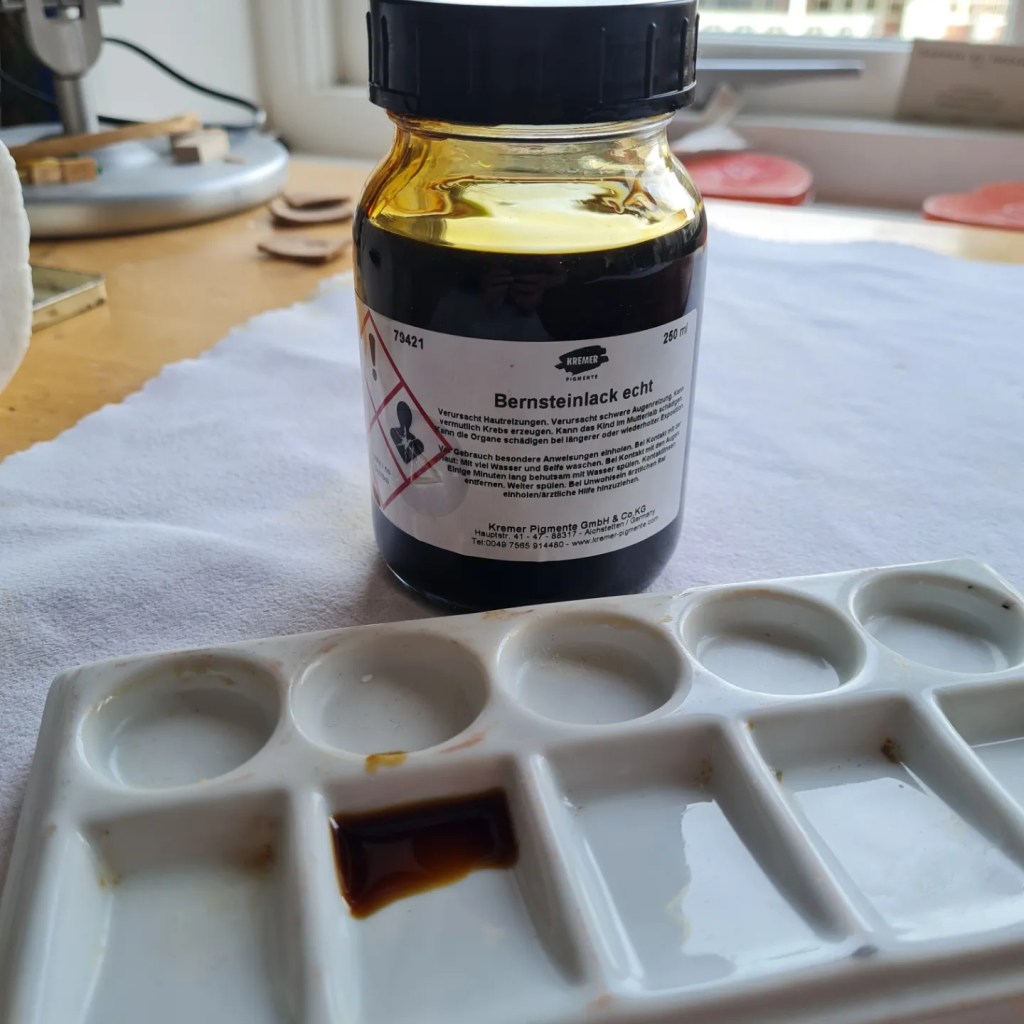
- Sealing the new wood. For large areas I sometimes use oil varnish rather than spirit varnish, mainly just for the ground colour which worked very well in this case with the quick drying Amber varnish from Kremer. Photo 2 & 3.
- Levelling out any undulations with filler varnish which also helps to create the right texture when the light bounces off the surface, created with a scraper which is my next task. The filler varnish takes a few days to dry, especially if it has been applied quite thick as it needed to be in this case. Photo 1 shows the filler before scraping.
If you are interested in the details of what chemical stains I use as well as the filler varnish etc, they are detailed in my Zoom lecture on retouching at https://iris-carr-restorations-ltd.teachable.com.
